Embroidery Digitizing Services play an important role in turning artwork, logos, and designs into embroidery files that machines can read. One of the most important decisions during digitizing is stitch direction. The direction in which stitches are placed affects the texture, appearance, strength, shape, and overall quality of the finished embroidery.
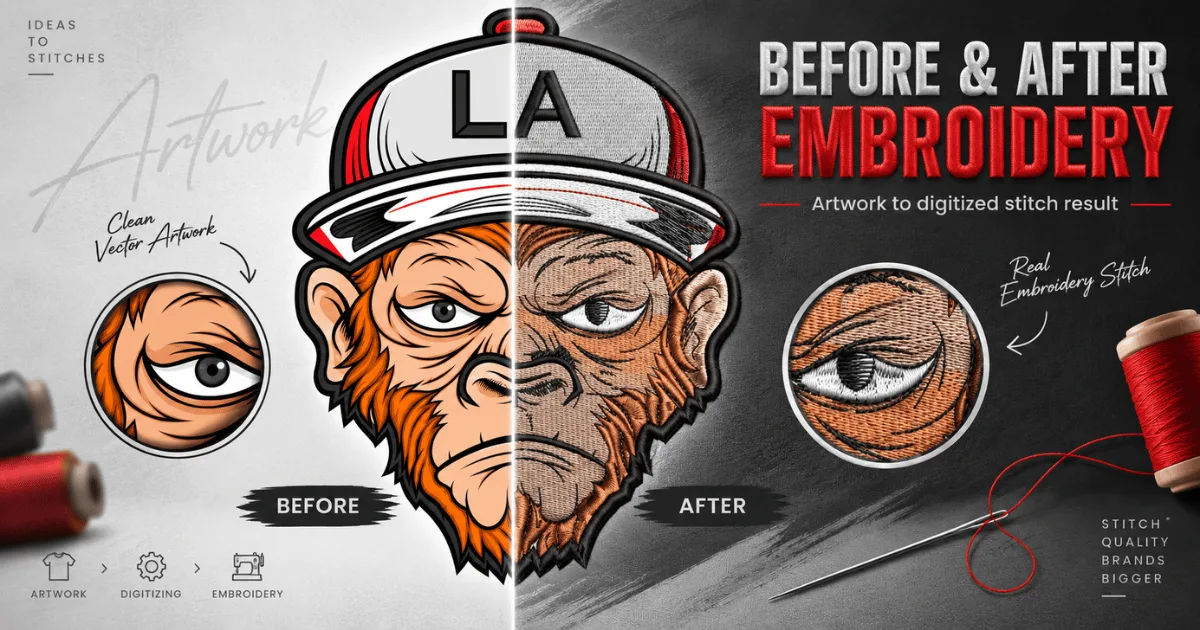
A design may look perfect on a computer screen but produce poor results when stitched if the stitch direction is not planned correctly. Uneven textures, visible gaps, excessive thread buildup, puckering, and distorted shapes can all result from incorrect stitch angles.
Professional digitizers therefore study every section of a design and decide how the stitches should flow. This process requires knowledge of embroidery techniques, fabric behavior, thread characteristics, and machine limitations.
This comprehensive guide explains how stitch direction is selected, why it matters, what factors influence it, and how professional digitizing produces clean and attractive embroidery.
What Is Stitch Direction in Embroidery?
Stitch direction refers to the angle and flow in which embroidery stitches are placed within a particular design area.
For example, stitches may run horizontally at approximately 0 degrees, diagonally at 45 degrees, vertically at 90 degrees, or follow a curved direction. A single embroidery design can contain several different stitch directions.
The goal is not simply to fill an area with thread. The stitches must be arranged so that they support the shape and visual appearance of the artwork.
A skilled digitizer determines where stitches should begin, where they should end, and how their direction should change from one section to another.
Why Is Stitch Direction Important?
Stitch direction affects much more than appearance. It can influence the physical behavior of the embroidery on fabric.
It Creates Visual Texture
Different stitch angles reflect light differently. Changing the direction between sections can make individual parts of a design easier to see.
For example, a flower may have petals stitched in different directions. This helps separate the petals visually and can create the impression of depth.
It Supports the Design Shape
Stitches should generally work with the shape of the object they are filling. Long narrow objects often benefit from stitches that follow their length, while rounded shapes may require curved or radial arrangements.
When the stitch direction works against the shape, the finished embroidery can look unnatural.
It Reduces Fabric Distortion
Embroidery involves placing many stitches into fabric. Each stitch pulls slightly on the material.
If too many stitches pull in the same direction, the fabric can become distorted. Proper stitch planning distributes this tension more effectively.
It Improves Dimensional Appearance
Stitch direction can be used to create visual highlights, shadows, and separation between design elements.
This is especially useful for logos, lettering, flowers, animals, portraits, and other detailed artwork.
How Do Professional Digitizers Determine Stitch Direction?
There is no single stitch direction that works for every design. Professional digitizers examine several characteristics before making a decision.
1. They Study the Original Artwork
The first step is understanding what the artwork is trying to communicate.
A digitizer examines the shape, size, colors, outlines, lettering, and individual design components. They determine which sections should appear flat and which should have more visual movement.
A simple logo might only require a few stitch directions, while a detailed illustration may require many.
The artwork's visual structure becomes the foundation for the embroidery plan.
2. They Divide the Design Into Sections
A complete design is usually separated into individual objects or areas.
For example, a company logo might contain:
- Background shapes
- Letters
- Borders
- Small symbols
- Decorative elements
- Large filled areas
Each section can have its own stitch direction.
This object-based approach allows the digitizer to control how the design will stitch rather than treating the artwork as one large image.
3. They Follow the Natural Shape
One of the most important principles is allowing stitches to follow the natural form of an object.
Consider a leaf. Instead of filling it with random horizontal stitches, the digitizer may use a direction that follows the central structure of the leaf.
Likewise, stitches in a curved letter may need to change direction as the shape changes.
This approach produces embroidery that looks more intentional and natural.
4. They Use Different Angles for Different Objects
A professional design rarely uses one angle throughout.
Different sections may use horizontal, vertical, diagonal, curved, or radial directions.
Changing direction helps separate neighboring areas. It also prevents a design from appearing visually flat.
For example, if two adjoining shapes are both filled with stitches at exactly the same angle, their boundaries may become difficult to distinguish.
Using contrasting directions can make the separation much clearer.
5. They Consider Stitch Length
Stitch direction and stitch length are closely connected.
Long stitches can create a smooth appearance in suitable areas, but they may become loose or snag easily when used inappropriately. Very short stitches can create excessive thread density.
The digitizer therefore chooses a direction that allows stitches to remain within practical length limits.
In narrow areas, the stitch direction may need to change so the machine can cover the shape without creating unstable stitches.
6. They Consider Fabric Type
Fabric plays a major role in stitch-direction decisions.
A stable fabric, such as denim, can support heavier embroidery than a lightweight or stretchy material. Knits and other flexible fabrics require careful planning because they can move and stretch during stitching.
Professional Embroidery Digitizing Services take fabric behavior into account when determining stitch angles, density, underlay, and sequencing.
The same artwork may therefore require adjustments when it is intended for different fabrics.
How Stitch Direction Works With Underlay
Underlay is the foundation placed underneath the visible embroidery.
It helps stabilize fabric, support the top stitches, and improve the overall structure of the design.
Why Underlay Direction Matters
Underlay stitches can run in directions that differ from the final visible stitches.
This creates a stronger foundation and helps prevent the top layer from simply following the same tension pattern as the underlying fabric.
For example, an underlay may cross beneath the main fill to provide stability.
Underlay Supports the Top Stitch Layer
The visible stitches need a stable surface beneath them. Without sufficient foundation, stitches can sink into fabric or produce an uneven appearance.
A digitizer balances underlay with the top stitch direction to create a clean result without unnecessary thread buildup.
Too much underlay, however, can make embroidery stiff and bulky. The correct amount depends on the fabric, design, and stitch type.
Common Stitch Directions Used in Embroidery
Several stitch-direction approaches are commonly used by professional digitizers.
Horizontal Stitching
Horizontal stitches run from side to side.
They can work well for certain rectangular or broad areas. However, using horizontal stitches everywhere can make a complex design appear flat.
Vertical Stitching
Vertical stitches run from top to bottom.
They are useful for some tall objects and can create a different visual texture from horizontal stitching.
Diagonal Stitching
Diagonal stitches are common because they provide visual movement and can work effectively across many shapes.
Angles such as 30, 45, or 60 degrees may be selected depending on the object's shape.
Curved Stitching
Curved stitching follows rounded or flowing forms.
It is particularly useful for organic shapes such as petals, leaves, waves, hair, and decorative curves.
Radial Stitching
Radial stitches spread outward from a central point.
This method can be useful for circular designs, flower centers, sun-like graphics, and other shapes where the stitches need to emphasize the center.
How Stitch Direction Affects Lettering
Text requires especially careful stitch planning.
Small letters have limited space, so poor stitch direction can make them difficult to read.
For larger lettering, stitches can be arranged to emphasize the shape of individual characters.
A digitizer also needs to consider where letters connect, how columns are formed, and whether the direction could cause excessive density.
The objective is to maintain clear letter shapes while avoiding unnecessary thread accumulation.
Stitch Direction in Satin Stitch Columns
Satin stitches are commonly used for borders, outlines, and lettering.
They generally run across the width of a narrow column rather than along its length.
The direction of these stitches affects how smoothly the column appears.
If a satin column changes width dramatically, the digitizer may need to modify the stitch arrangement. Otherwise, the embroidery can develop uneven spacing or inconsistent coverage.
This is one reason automatic digitizing often needs manual correction.
Stitch Direction in Fill Areas
Large fill areas require careful planning because they can contain thousands of stitches.
A fill direction determines how the thread travels across the area.
For large shapes, the digitizer may use a consistent angle or introduce changes to create texture and reduce visual monotony.
The fill should also work with the underlay and fabric stability.
Poorly planned large fills can lead to puckering, distortion, excessive density, or visible gaps.
How Digitizers Handle Changes in Direction
Changing stitch direction is useful, but it must be done carefully.
Sudden changes can create unnecessary jumps or thread buildup. The transition between two areas should therefore be planned as part of the overall stitch sequence.
Professional digitizers consider:
- Object boundaries
- Stitch density
- Entry and exit points
- Underlay
- Thread path
- Fabric stability
- Design size
- Machine capabilities
These factors work together rather than independently.
The Role of Stitch Sequence
Stitch sequence determines the order in which different design elements are embroidered.
It is closely connected to stitch direction because one section may need to be completed before another.
A good sequence can reduce unnecessary movement and help maintain accurate registration.
For example, a background element may be stitched before foreground details. Borders and small details may then be added at appropriate stages.
Correct sequencing also helps ensure that overlapping objects interact properly.
What Happens When Stitch Direction Is Incorrect?
Incorrect stitch direction can cause several problems.
Uneven Appearance
The embroidery may have inconsistent texture, making some areas appear rough or poorly finished.
Puckering
Excessive pulling in one direction can distort the fabric around heavily embroidered sections.
Poor Shape Definition
When stitches do not follow the intended form, curved or detailed objects can lose their visual structure.
Excessive Thread Density
Incorrect planning may force too many stitches into a limited space.
This can make the embroidery stiff and uncomfortable while also increasing production time.
Weak or Loose Stitches
If stitches are too long or poorly supported, they may become loose and vulnerable to snagging.
Why Manual Digitizing Can Be Valuable
Automatic digitizing software can convert artwork into embroidery patterns quickly, but automatic results are not always production-ready.
Software may not understand the visual intention behind an image in the same way an experienced digitizer does.
Manual adjustments allow the professional to control stitch direction, object boundaries, density, underlay, sequencing, and transitions.
This is especially important for complicated artwork, small lettering, detailed logos, and designs intended for difficult fabrics.
Testing the Stitch Direction
A professional embroidery file should ideally be tested before large-scale production.
A test stitch-out can reveal problems that are difficult to identify on a computer screen.
The digitizer can inspect the sample for:
- Puckering
- Gaps
- Uneven coverage
- Thread buildup
- Poor registration
- Weak details
- Incorrect textures
- Distorted shapes
Based on the results, the embroidery file can be adjusted.
Testing is particularly important when a design is being produced on a new fabric or with a different machine.
How Software Helps Set Stitch Direction
Modern embroidery software provides tools for controlling stitch angles and fill patterns.
A digitizer can assign different directions to individual objects and modify them as necessary.
Software can also help with density calculations, stitch sequencing, underlay settings, pull compensation, and stitch generation.
However, software remains a tool. Good results depend on how effectively the digitizer uses it.
Technical knowledge and artistic judgment are still essential.
Pull Compensation and Stitch Direction
Pull compensation is another important consideration.
When embroidery is stitched, thread tension can cause some objects to become slightly narrower or distorted.
A digitizer can compensate for this by adjusting the design where necessary.
Stitch direction affects how these forces are distributed. Therefore, pull compensation and stitch angle often need to be considered together.
This becomes especially important with satin columns, small lettering, and designs containing strong directional elements.
How Professionals Balance Appearance and Machine Performance
A beautiful design must also be practical for embroidery machines.
A digitizer cannot simply choose stitch directions based on appearance. The design must stitch efficiently and reliably.
Excessive changes in direction may increase stitch count and production time.
Too many small stitches can cause thread breaks and needle problems.
A professional therefore seeks a balance between artistic quality and technical efficiency.
Why Experience Matters in Stitch Direction
Stitch direction is both a technical and creative skill.
Someone experienced in embroidery understands how thread behaves when placed at different angles. They also know how fabric reacts to embroidery and how machine settings can influence the final product.
Experience helps a digitizer predict problems before they occur.
That knowledge is particularly valuable when working with unusual materials, large logos, detailed artwork, or very small designs.
Tips for Getting Better Embroidery Results
When preparing artwork for digitizing, provide the clearest version available.
Tell the digitizer what type of fabric will be used and approximately how large the finished embroidery should be.
If the design will be placed on a cap, jacket, shirt, bag, or other product, mention that as well.
Different products can require different approaches.
It is also helpful to request a test stitch-out when accuracy is important. A sample gives you an opportunity to evaluate the actual embroidery instead of relying only on a digital preview.
The Importance of Professional Embroidery Digitizing
High-quality embroidery is not simply about converting an image into stitches.
It involves interpreting artwork and rebuilding it in a format that works with thread, fabric, needles, and embroidery machines.
Professional Embroidery Digitizing Services carefully plan stitch direction as part of this process.
They consider the visual design while also managing density, underlay, sequencing, pull compensation, stitch length, and fabric behavior.
The result is a design that is more likely to stitch cleanly and maintain its intended appearance.
Conclusion
Stitch direction is one of the most important elements of professional embroidery digitizing. It determines how thread moves across individual design sections and strongly influences texture, shape, stability, and visual depth.
Professional Embroidery Digitizing Services do not select stitch directions randomly. They study the artwork, divide it into manageable objects, evaluate each shape, and choose appropriate angles based on the design and fabric.
Horizontal, vertical, diagonal, curved, and radial directions can all serve different purposes. The best choice depends on the shape being embroidered, the desired visual effect, the material, stitch density, and machine requirements.
Stitch direction must also work together with underlay, stitch sequence, pull compensation, and stitch length. A design that looks good digitally can still fail during production if these elements are poorly coordinated.
Testing is another important step. A stitch-out allows the digitizer to identify issues such as puckering, gaps, distortion, excessive density, and uneven coverage before the design enters full production.
Ultimately, successful embroidery depends on combining technical control with artistic judgment. Good stitch direction makes embroidery cleaner, stronger, easier to read, and more visually appealing. When every section has been carefully planned, the finished design can closely reproduce the character and detail of the original artwork while remaining practical for real-world production.